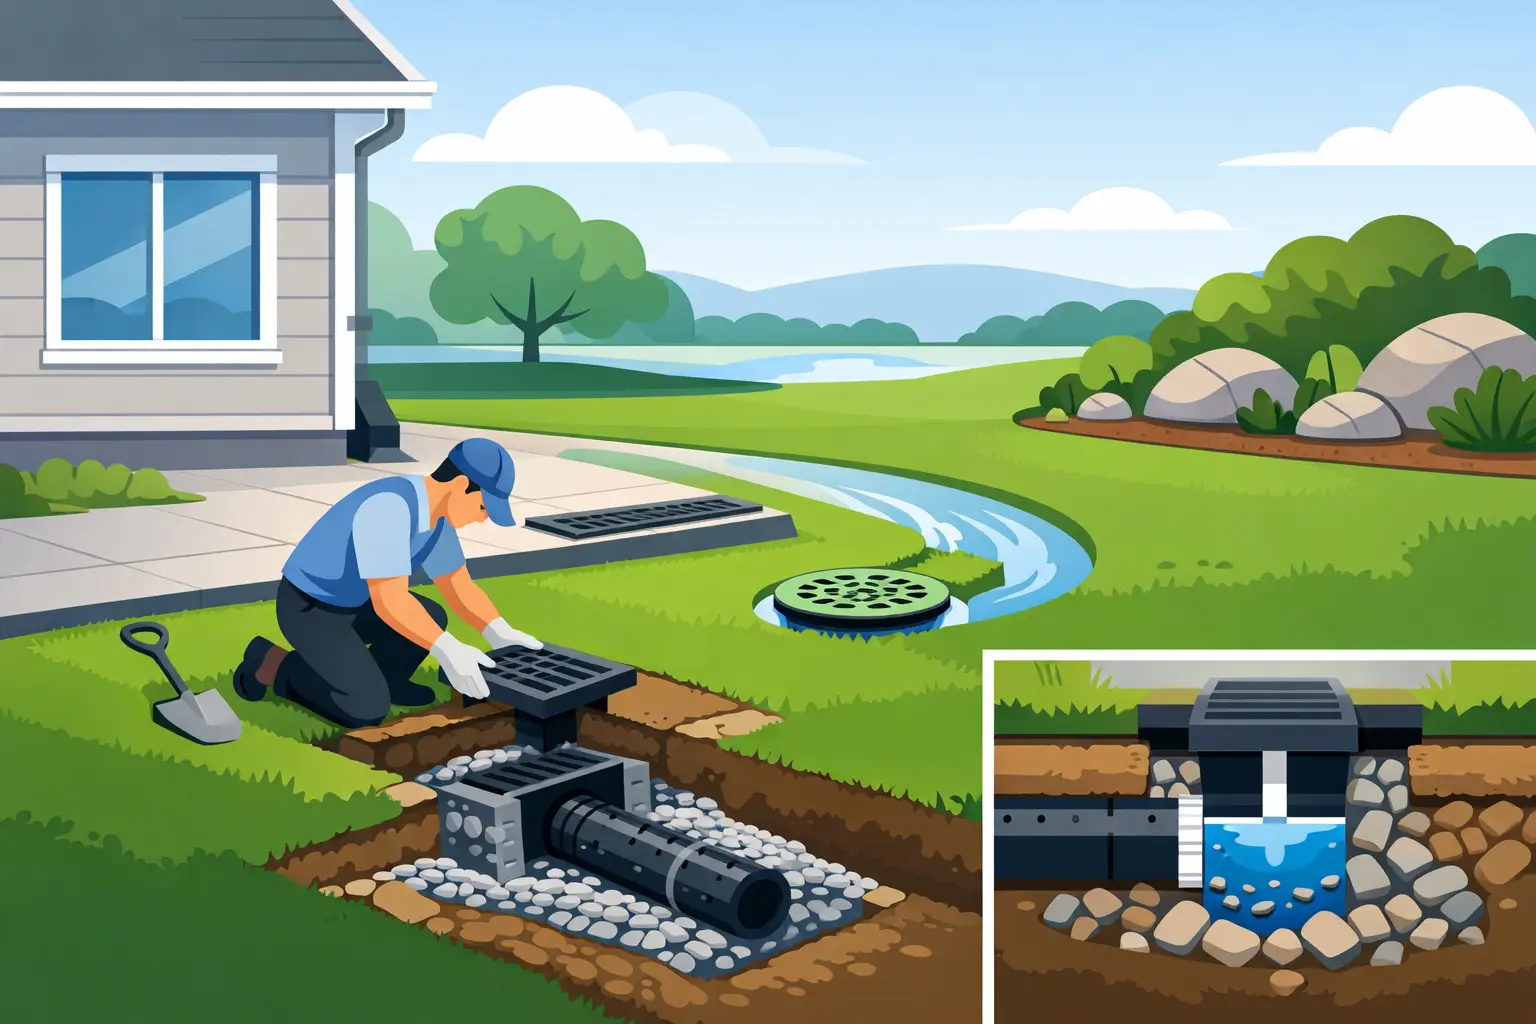
How to Install Surface Drains Around Your Home
September 8, 2026
A puddle that remains beside the house long after a North Texas storm is more than a lawn problem. Water collecting at the foundation can soften and swell expansive clay soils, then leave them dry enough to shrink again. That repeating movement puts stress on slabs, masonry, doors, windows, and interior finishes. Learning how to install surface drains can help move concentrated runoff away before it becomes a more expensive foundation concern.
Surface drainage is not a cure for every wet yard. It works best when rainwater is collecting at low points, downspout outlets, patio edges, driveway transitions, or other visible areas where runoff has nowhere to go. The goal is simple: collect water at the surface, carry it through solid pipe, and discharge it at a safe location that slopes away from the structure.
Start With the Water, Not the Drain
The most common drainage mistake is installing a catch basin where water appears to sit, without identifying where the water comes from or where it can legally and safely go. Before digging, walk the property during a rainstorm if possible. Watch the roof runoff, neighboring grades, paved areas, and low spots. A surface drain needs a reliable collection point and a workable outlet.
Look for water that ponds for more than a day, flows toward the home, erodes soil, or repeatedly saturates a flower bed against the foundation. Also note downspouts that empty near the house. A roof can shed a surprising amount of water in a short storm, and simply extending a downspout may be enough in some situations.
For many Dallas-Fort Worth homes, the best plan combines a catch basin at a low spot with a solid drain line that carries water to daylight, a curb opening where allowed, or a pop-up emitter in a lower portion of the yard. The outlet must remain below the basin and far enough from the home that water cannot work its way back toward the foundation.
Plan the Route and Slope
A surface drain only performs as well as its slope. Water does not travel uphill, and a nearly flat pipe can hold sediment, leaves, and standing water. Plan for a continuous downhill path from the basin to the discharge point. A practical target for solid drainage pipe is about 1/8 inch of fall per foot, or roughly a 1 percent grade.
Measure the proposed route before buying materials. Set a string line from the catch basin location to the outlet, then use a line level or laser level to confirm there is enough elevation change. If the yard does not provide a natural downhill exit, the project may require a different outlet strategy, regrading, or a professionally designed drainage system.
Keep the discharge away from property lines, sidewalks, driveways, and adjacent structures unless local requirements specifically permit it. Never direct water onto a neighbor’s property. In addition to creating conflict, it can expose the homeowner to drainage and code issues.
Call Before You Dig
Call 811 before excavation so buried utility lines can be marked. This step is essential around electric, gas, telecommunications, irrigation, and sewer lines. Mark sprinkler heads, landscape lighting, fence posts, and other private features as well.
If the drain route crosses a driveway, passes close to a retaining wall, or requires digging near the foundation, pause and get professional guidance. Those conditions can affect structural elements or call for equipment beyond a typical homeowner project.
Choose Materials That Match the Job
For a typical yard low spot, use a sturdy surface catch basin with a grate sized for the expected runoff. The basin should connect to solid, smooth-wall drainage pipe, commonly 4-inch PVC or other approved solid pipe. Solid pipe is important because its job is to transport collected water to an outlet.
Perforated pipe serves a different purpose. It is used in French drain systems to collect groundwater through the sides of the pipe. Installing perforated pipe for a surface drain can release water into the soil before it reaches the discharge point, which may keep the area around the foundation wetter than intended.
You will also need fittings, pipe cement if using PVC, gravel or compacted bedding material as appropriate, landscape fabric for certain basin installations, and an outlet device such as a pop-up emitter. Select a grate that can withstand its location. A pedestrian-rated grate may work in a landscaped bed, while areas exposed to vehicles need components designed for traffic loads.
How to Install Surface Drains Step by Step
Begin by marking the basin location at the lowest practical point where runoff naturally gathers. The grate should finish flush with the surrounding grade or just slightly below it, so water enters rather than flowing around it. Avoid setting it too low in loose mulch beds, where soil and debris can quickly fill the basin.
Dig the trench from the outlet back toward the catch basin. Working uphill makes it easier to preserve the planned slope. The trench should be wide enough to place and connect the pipe without forcing fittings, and deep enough to protect the pipe while maintaining the necessary fall. Depth depends on the route, expected traffic, frost concerns, and local conditions, but the pipe must not be shallow enough to be crushed by lawn equipment or vehicle loads.
Shape the trench bottom to a consistent slope. Remove high spots and soft pockets rather than trying to force the pipe into place. Add a stable bedding layer where soil is rocky or uneven. In much of North Texas, clay soil can become slick and unstable when wet, so do not install pipe into a muddy trench that will shift as it dries.
Set the catch basin in place and check its final elevation with a straightedge or level. Connect the outlet pipe to the basin, then dry-fit the remaining pipe and fittings along the trench. Confirm that every connection aligns and that the line continues downhill without dips. A dip creates a collection point for sediment and standing water.
Once the layout is correct, make permanent connections according to the pipe manufacturer’s instructions. For PVC, clean and cement the joints properly. For other pipe systems, use compatible couplings that resist separation and soil intrusion. Install cleanouts where the route has long runs or direction changes, especially if leaves, roof grit, or lawn debris are likely to enter the system.
At the outlet, install a pop-up emitter or another approved termination point. The outlet should sit at a lower grade and release water onto an area that can absorb or carry it away without erosion. Use splash protection, rock, or vegetation where needed to slow the discharge and protect the soil.
Before backfilling, test the system with a hose. Fill the basin and watch the outlet. Water should move steadily, with no standing water in the basin after the flow stops. If the drain is slow, check for a low spot, a blocked fitting, insufficient slope, or an outlet that is higher than expected.
Backfill carefully after the test. Place soil in lifts and compact it gently around the pipe so it has support, but do not crush or distort the line. Restore the finish grade so surface water continues toward the grate. A perfectly installed basin will still fail if surrounding soil is graded to send water around it.
Maintenance Keeps the Drain Working
Surface drains need attention, particularly after windy storms and leaf drop. Lift the grate periodically and remove leaves, mulch, roof granules, and sediment from the basin. Check the outlet for grass, soil, or insect nests that could block discharge.
A hose test once or twice a year is a practical habit. If water backs up, address the issue early rather than waiting for the next heavy rain. Catch basins are accessible by design, which makes routine cleaning far easier than repairing water damage after the fact.
When a Professional Drainage Plan Is the Better Choice
A do-it-yourself surface drain can be a good fit for a straightforward low spot with a clear downhill outlet. It is not the right answer when water is collecting along multiple sides of the home, the yard is flat, drainage crosses hardscape, or foundation movement is already visible.
Cracks in brick or drywall, sticking doors, sloping floors, and recurring water near the slab deserve a complete assessment. Drainage and foundation performance are connected, but the correct repair may involve surface drains, French drains, grading adjustments, gutter changes, or foundation work depending on the property.
All American Foundation Repair & Drainage has worked with North Texas soil and moisture conditions since 1969. A clear drainage evaluation can identify whether a simple surface drain will protect the property or whether the water problem requires a broader, long-term plan.
The best time to correct drainage is when water is still a visible inconvenience, not after it has had years to affect the ground supporting your home. Pay attention to where the next storm sends water, and make sure it has a safe path away from the foundation.